After trying this pasta salad recipe, I can honestly say it’s earned a permanent spot in my recipe rotation. It’s incredibly easy to whip up, full of bright, bold flavors, and the texture is just right with that perfect al dente pasta.
I made this one afternoon when I had a mix of leftover veggies in the fridge and some salami that needed using up. The result? A dish that everyone raved about. And while this may not be the Honeycrisp Apple Broccoli Salad recipe, it’s definitely a crowd-pleasing, summer-ready winner in its own right!
Additional Tips to Make This Pasta Salad Even Better
Here’s what I learned the first time I made this dish—and how you can make it even more delicious next time!
- Use good-quality olive oil. I tried it once with a cheaper bottle, and the dressing lacked richness. A fruity, extra virgin olive oil makes a huge difference.
- Chop everything small. Cutting the vegetables and salami into bite-sized pieces makes each forkful flavorful and balanced.
- Let it chill longer. I found that chilling the salad for at least 2 hours (instead of 1) really allows the flavors to meld beautifully.
- Don’t skip the Dijon. That tiny bit of mustard brings just the right amount of tang to the dressing. It’s subtle, but essential.
- Rinse the pasta well. Cooling the pasta under cold water immediately after cooking helps stop the cooking and keeps it from clumping together.
Delicious Twists and Variations to Try
Want to switch things up a bit? Here are some tasty alternatives you can try based on your needs or pantry stock.
- Dairy-Free: Skip the mozzarella balls or swap with dairy-free cheese alternatives.
- Vegetarian Option: Leave out the salami and add chickpeas or roasted red peppers for extra flavor and protein.
- Gluten-Free: Use gluten-free fusilli pasta to keep it allergy-friendly.
- Extra Flavor Boost: Add a splash of balsamic vinegar or a few sun-dried tomatoes for tang and depth.
- Low-Sugar Version: Replace maple syrup with a pinch of stevia or leave it out entirely.
You can also explore other salad recipes using the same approach—mix-and-match veggies, dressings, and proteins!
Must-Have Kitchen Tools for This Recipe
Making this recipe doesn’t require fancy tools, but a few essentials will make the process easier.
- Large pot – For boiling the pasta to the perfect al dente texture.
- Colander – To drain the pasta quickly and rinse with cold water.
- Sharp knife and cutting board – For prepping vegetables and salami with precision.
- Large mixing bowl – For tossing everything together with the dressing.
- Mason jar or small whisk – To mix and emulsify the dressing ingredients with ease.
How to Serve Pasta Salad with Salami
Looking to wow your guests or elevate your lunch game? Here’s how I love to serve this dish!
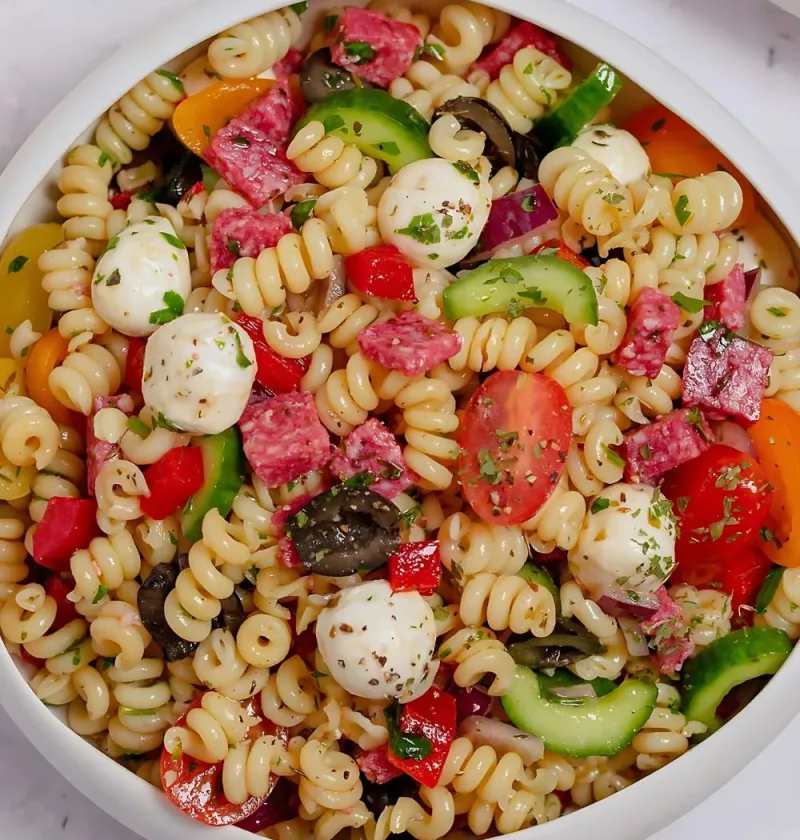
Serve it in a clear glass bowl to show off all the beautiful colors—it looks as good as it tastes! Garnish with a few whole parsley leaves or an extra drizzle of olive oil before serving for a polished touch. I also love pairing this with grilled chicken or serving it alongside a light corn salad recipe for a complete BBQ spread.

How to Store Pasta Salad
Keep your leftovers fresh and flavorful with these storage tips:
- Refrigeration: Store in an airtight container in the fridge for up to 4 days. Give it a quick toss before serving, and add a splash of olive oil or lemon juice if it seems dry.
- Freezing: Not recommended. The texture of the pasta and fresh veggies doesn’t hold up well in the freezer.
- Reheating: This dish is best served cold, but if you do want to eat it warm, gently heat in the microwave for 30 seconds. Just be aware that the texture may change slightly.
Why You’ll Love This Pasta Salad
Here’s what makes this recipe one of my top go-tos when I need something quick, satisfying, and shareable.
- Quick and Easy to Make: You only need 25 minutes from start to finish—including chopping and mixing!
- Full of Fresh Flavor: The mix of herbs, crunchy veggies, and tangy dressing makes every bite interesting.
- Perfect for Meal Prep: Make a batch on Sunday and enjoy it throughout the week without it getting soggy.
- Customizable: You can tailor it to any diet or preference—vegan, gluten-free, low-carb, etc.
- Great for Gatherings: It’s a guaranteed crowd-pleaser and travels well for potlucks or picnics.
What You Should Know Before Making It
To ensure your pasta salad turns out as perfect as mine did, here are a few more helpful tips:
- Cook your pasta until al dente. Overcooked pasta gets mushy when chilled. You want it to still have some bite.
- Use fresh, firm vegetables. Cherry tomatoes, cucumbers, and red bell peppers should be fresh to maintain their crunch and flavor.
- Give the dressing a good shake. I like using a mason jar because it helps emulsify everything so you get even flavor throughout.
- Let it rest before serving. The flavors come together beautifully after a bit of fridge time. It’s worth the wait!
Pasta Salad Recipe
Ingredients
Method
- Start by boiling your fusilli pasta in salted water according to the package directions, just until al dente. Avoid overcooking, as mushy pasta doesn’t hold up well in a cold salad. Once cooked, drain the pasta in a colander and rinse thoroughly under cold running water. This stops the cooking and cools the pasta quickly, which is key for texture and flavor.
- While the pasta is cooking, prepare the dressing in a mason jar or measuring cup. Combine dried thyme, dried oregano, fresh lemon juice, olive oil, Dijon mustard, maple syrup, and black pepper. Shake or whisk vigorously until fully blended. The mustard helps emulsify the mixture, while the syrup softens the acidity of the lemon for a perfectly balanced flavor.
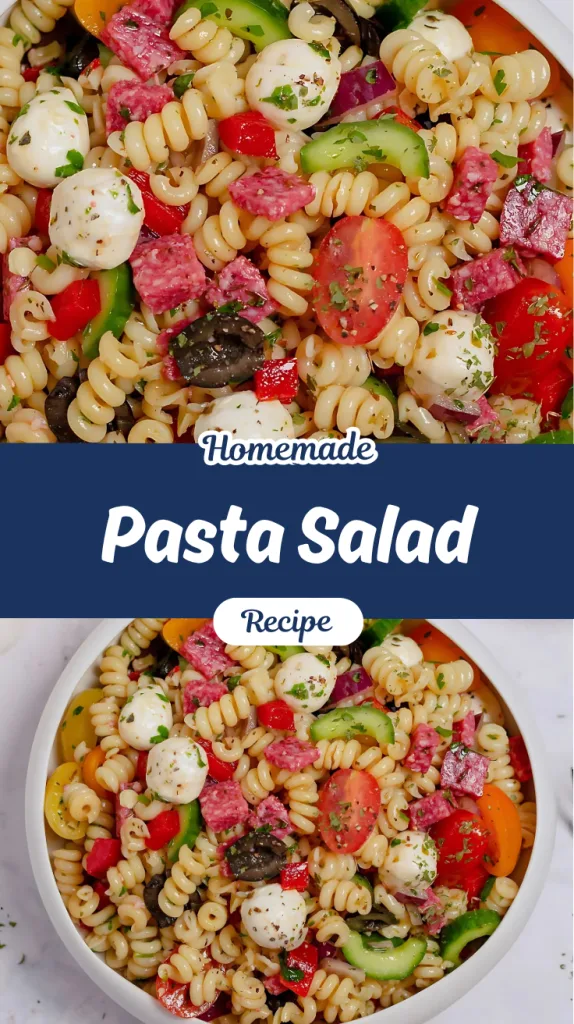
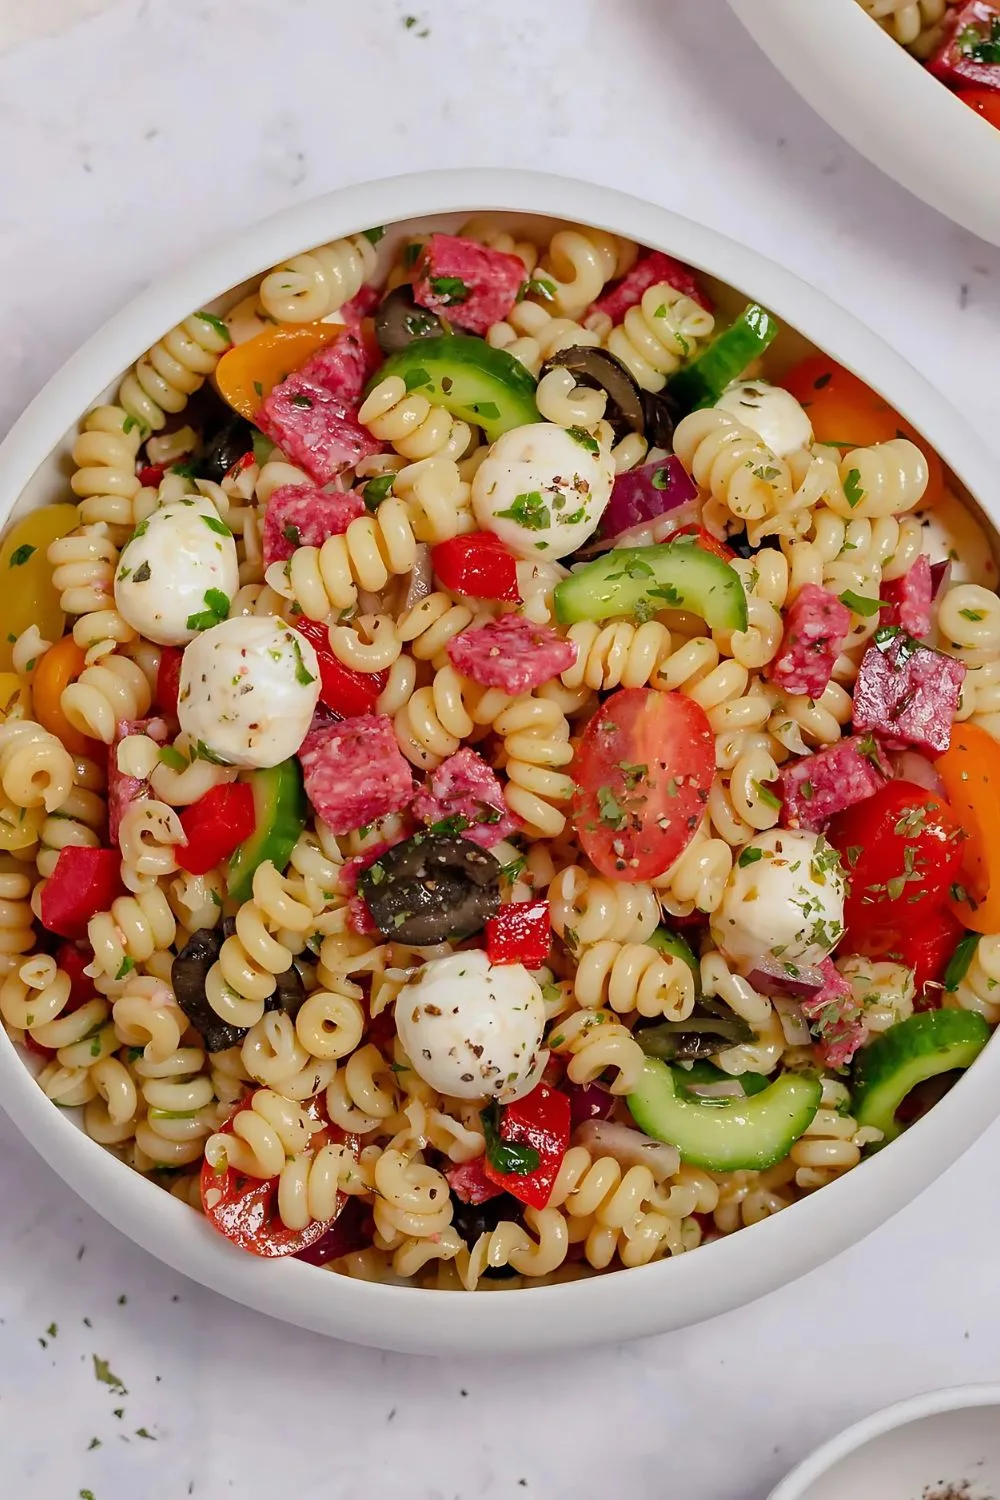
- While your pasta cools, chop the cherry tomatoes, cucumber, red onion, parsley, red bell pepper, and salami into bite-sized pieces. Make sure all the vegetables are fresh and firm – it makes a big difference in the final salad texture. Combine them all in a large mixing bowl, so they’re ready to be tossed with the pasta.
- Once the pasta is cooled, add it to the large bowl with the veggies and salami. Pour the dressing over everything and gently mix until well coated. Be thorough but gentle – you want the dressing to reach every bite without crushing the more delicate ingredients like mozzarella balls and tomatoes.
- Cover the bowl with plastic wrap and refrigerate for at least 1 hour before serving. This chilling step lets the flavors meld and enhances the overall taste. Give it one final toss before serving. You can serve this as a side dish or enjoy it on its own – it’s satisfying either way!